In this article, I will be creating a Resource Group and Creating a Linux VM (virtual machine) using the Azure CLI I will be using CLI commands in the Azure cloud shell.
CLI stands for the Command-Line Interface. It is a text-based interface that allows one to interact with one's computer or operating system by typing commands
The Azure CLI is used to create and manage Azure resources via either the command line or scripts.
Launch Azure Cloud Shell
It has common Azure tools preinstalled and configured to use with your account.
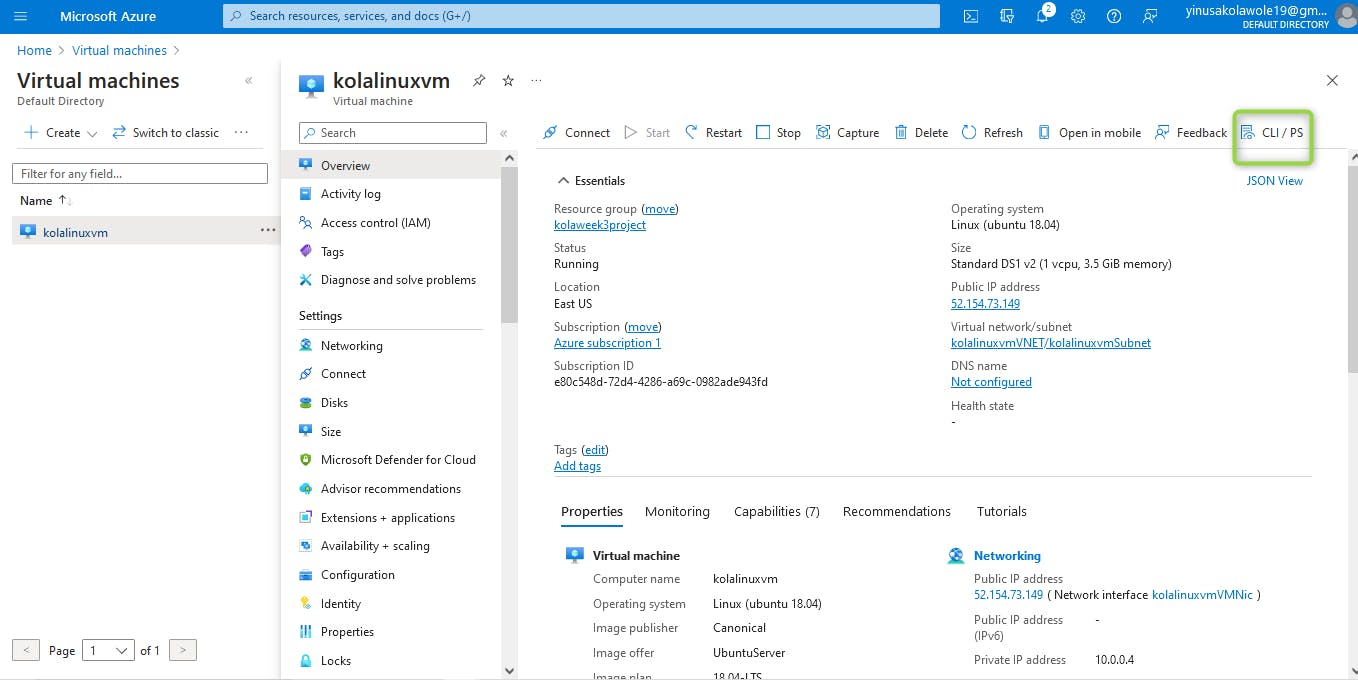
To open the Cloud Shell, just select "CLI Button" from the upper right corner as seen below.
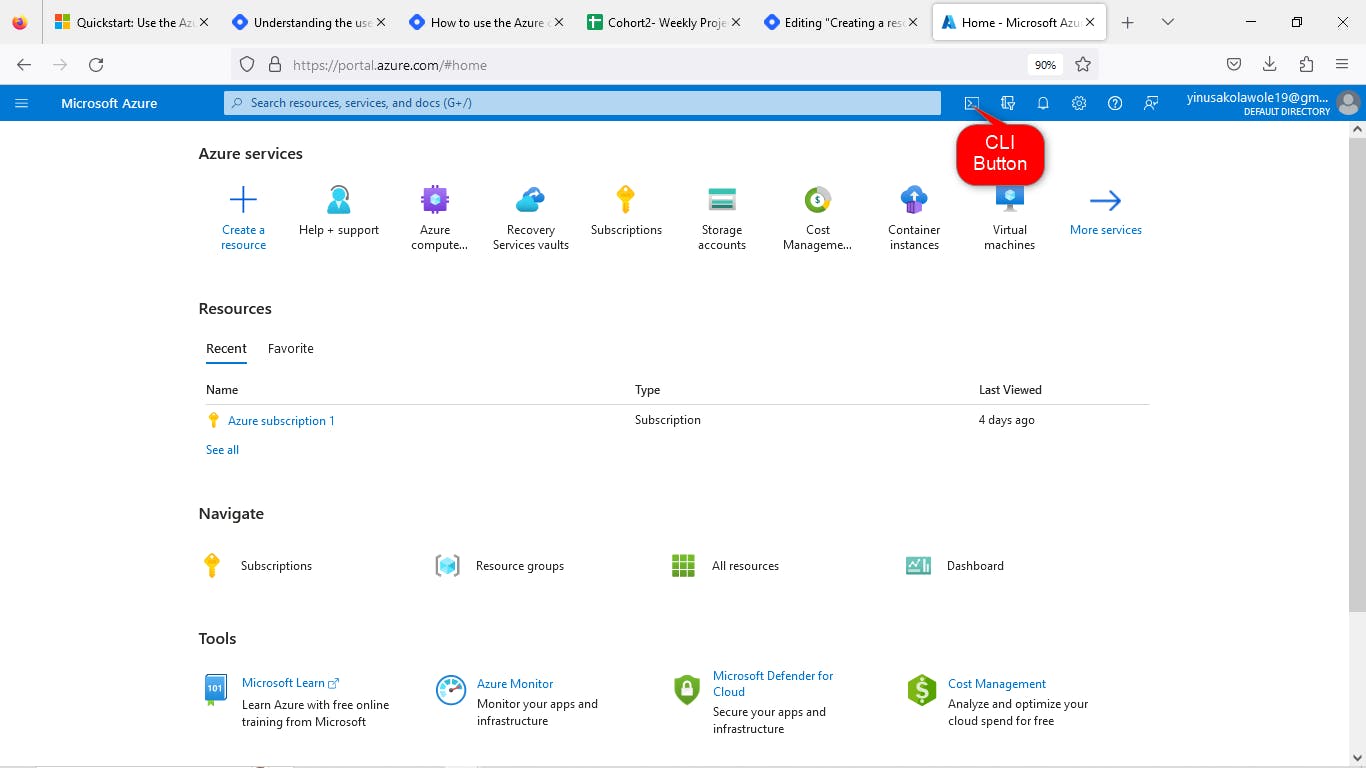
You have to "create storage" as seen below
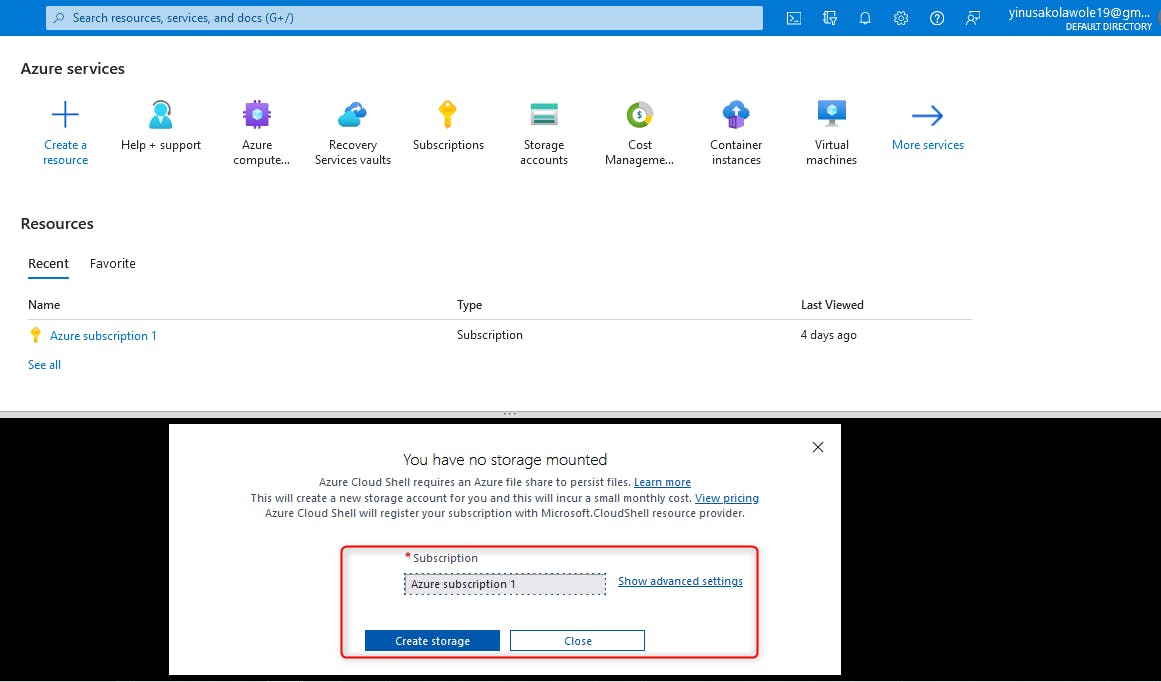
Storage Creating as seen below
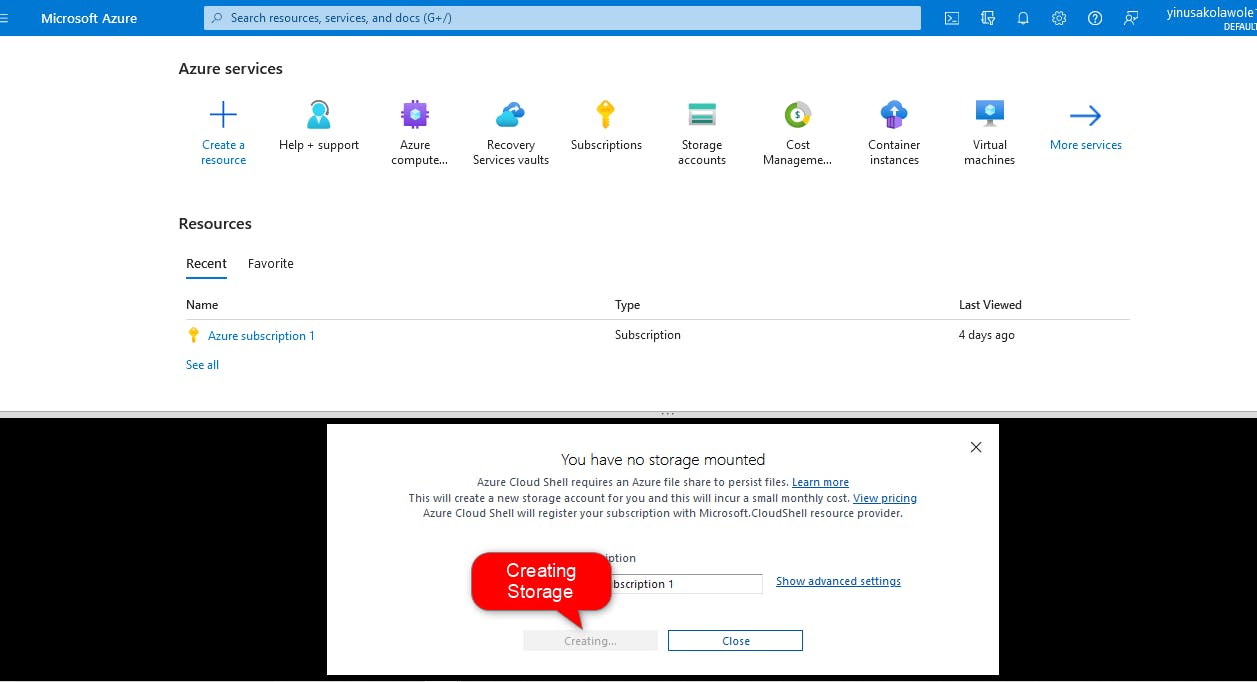
Am using Powershell via the CLI interface
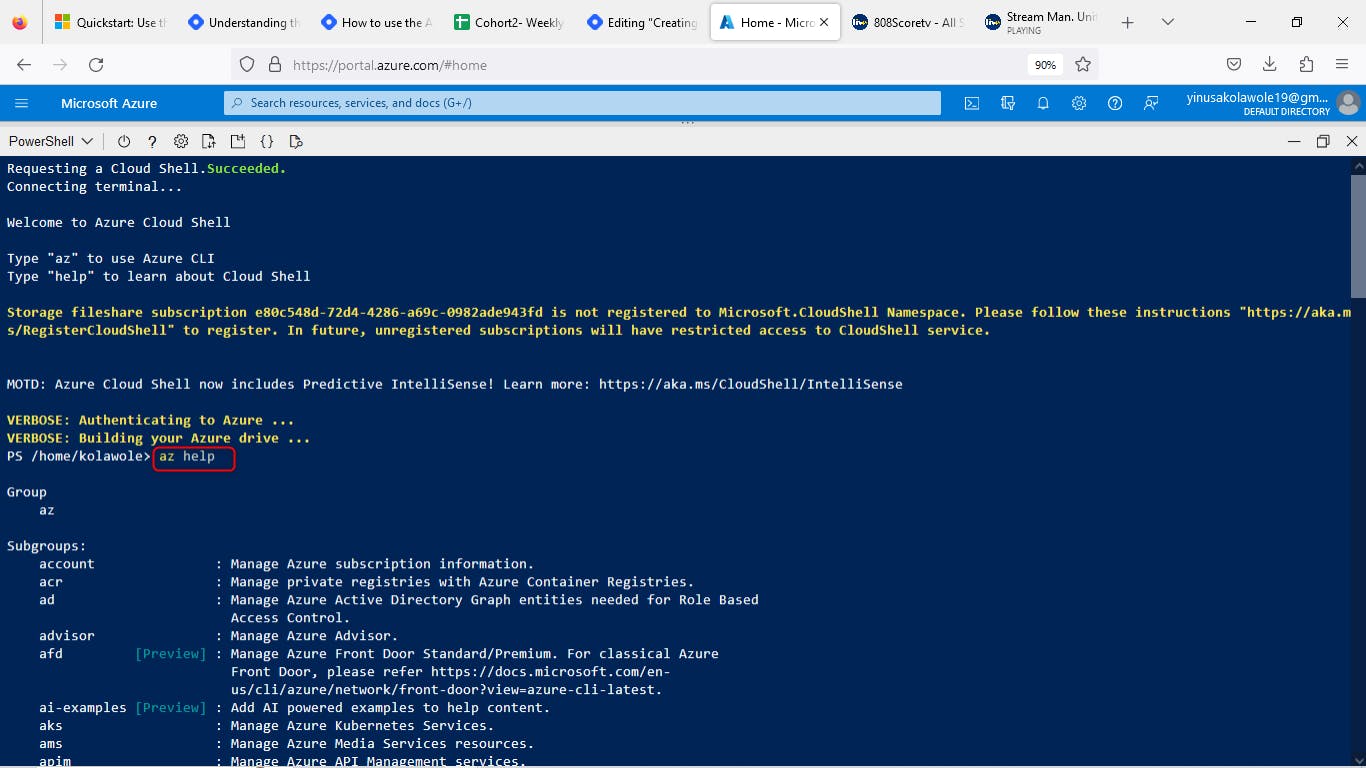
You can try out "az help" commands for some list of command you could try out.
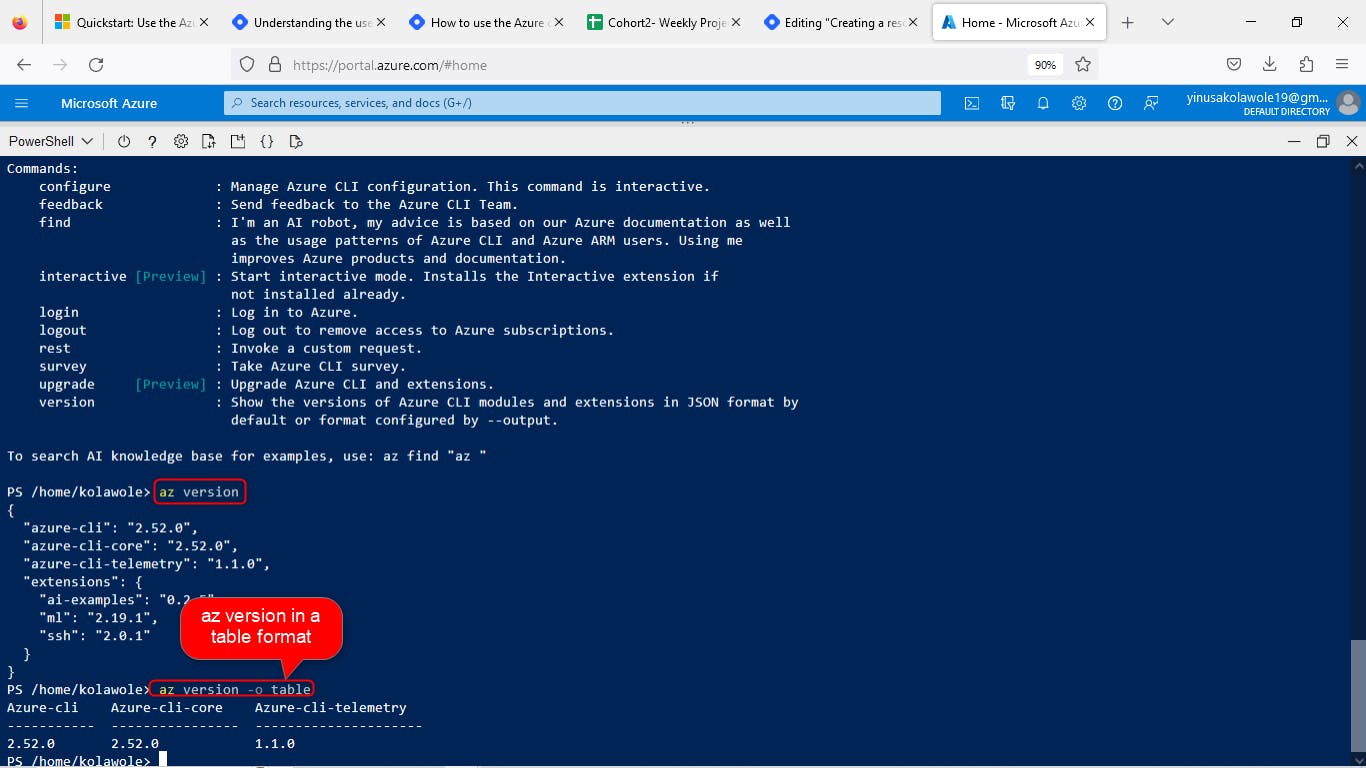
To check for the current version of az, type "az version" if you want it to show in a table format add "-o table" where -o is short-form for output.
As shown in the diagram below.
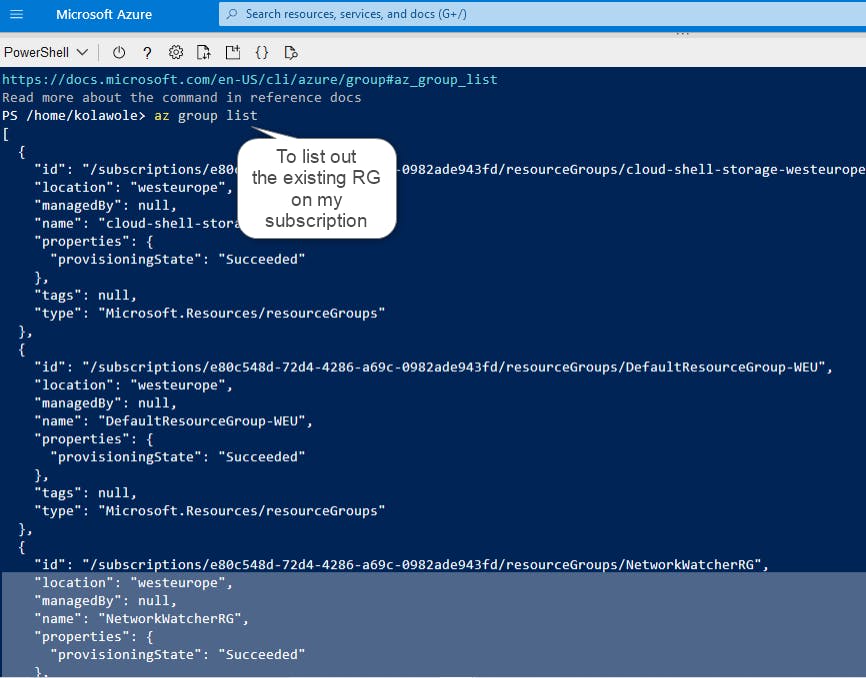
To Check Existing Resource Group on the CLI Page use the command "az group list" as shown below.
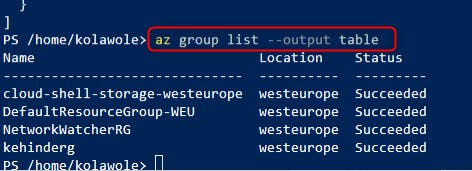
If you want it in the table format, which i think its the best add "--output table"
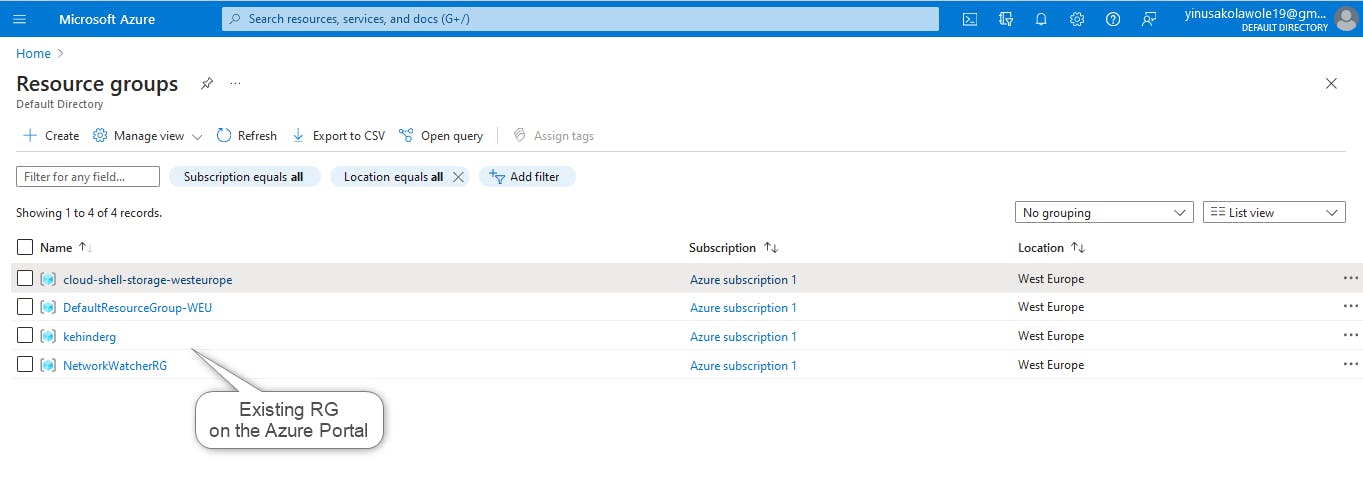
Confirmation of the existing Resource groups on the Azure Portal as seen on the CLI Page.
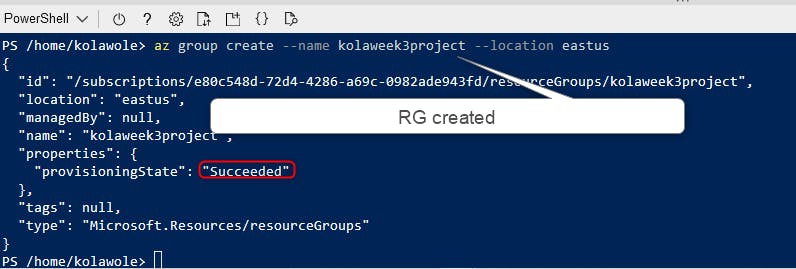
To create a Resource Group on the CLI page. you can use the command "az group create --name $RESOURCE_GROUP_NAME --location $LOCATION"
$RESOURCE_GROUP_NAME: Preferred Resource name. $LOCATION: Location where you want your resource to be deployed.
"Succeeded" in the display below confirms the resource group created successfully.
Below is a list of my existing Resource group listed in table
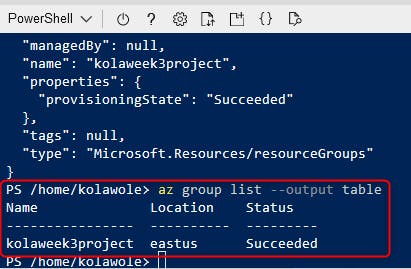
Confirmation of Resource group created on the CLI page on the Azure Portal

Next is to create VM(Linux) on the CLI page. Kindly use the command "az vm create --resource-group $RESOURCE_GROUP_NAME --name $VM_NAME --image $VM_IMAGE --admin-username $USERNAME_CHOICE --admin-password $PASSWORD_CHOICE --authentication-type $PASSWORD"
The diagram below shows an Example of creating a virtual machine using the CLI Page. Its "Running" as seen below.

The VM is in the running state as seen below.

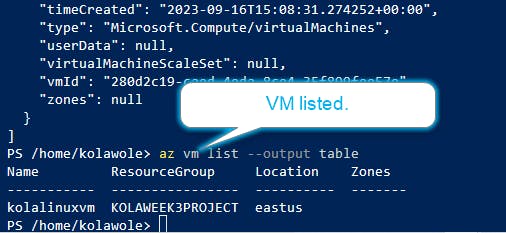
Below is a list of my existing VM listed in table.
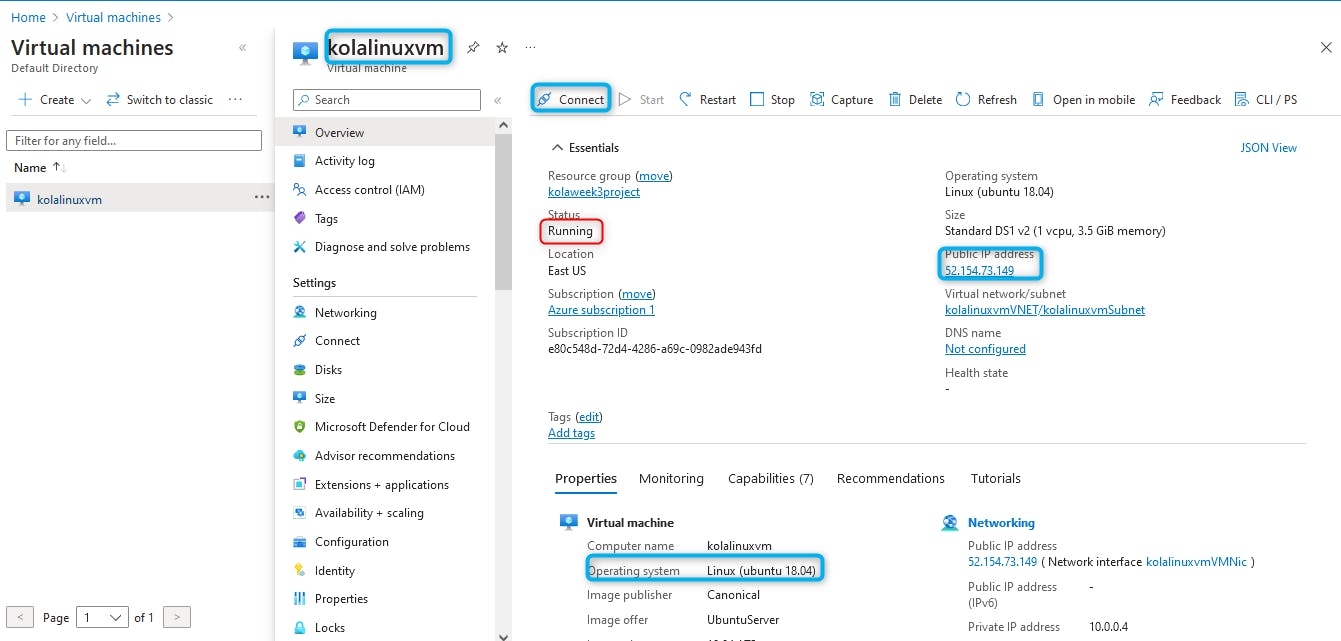
A confirmation of the VM running on the Azure Portal.

Diagram below shows the VM running, IP address allocated for the VM and the operating system its running and other informations about the created Virtual Machine.
Below is the processes of you logging in to your VM via the CLI Page
Log in user the command line "ssh azureuser@ipaddress" allocated to the VM created.
Enter the Password created for the VM. The Password won't be visible when typing it because of Linux security.
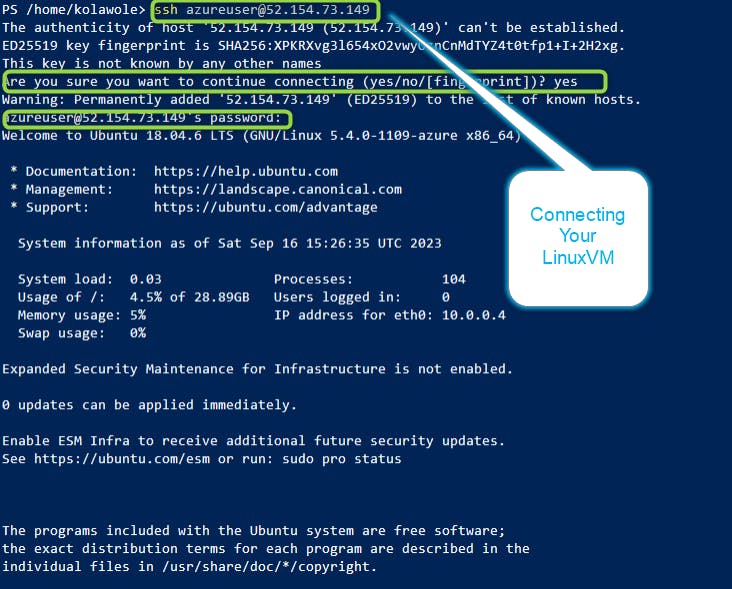
My Linux VM has been connected successfully as seen below.

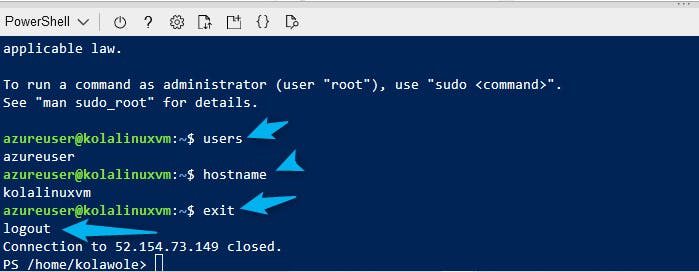
Trying out some few commands
The exit command is ues to log-out of the VM as seen below
You can access the CLI command via the CLI/PS as seen below
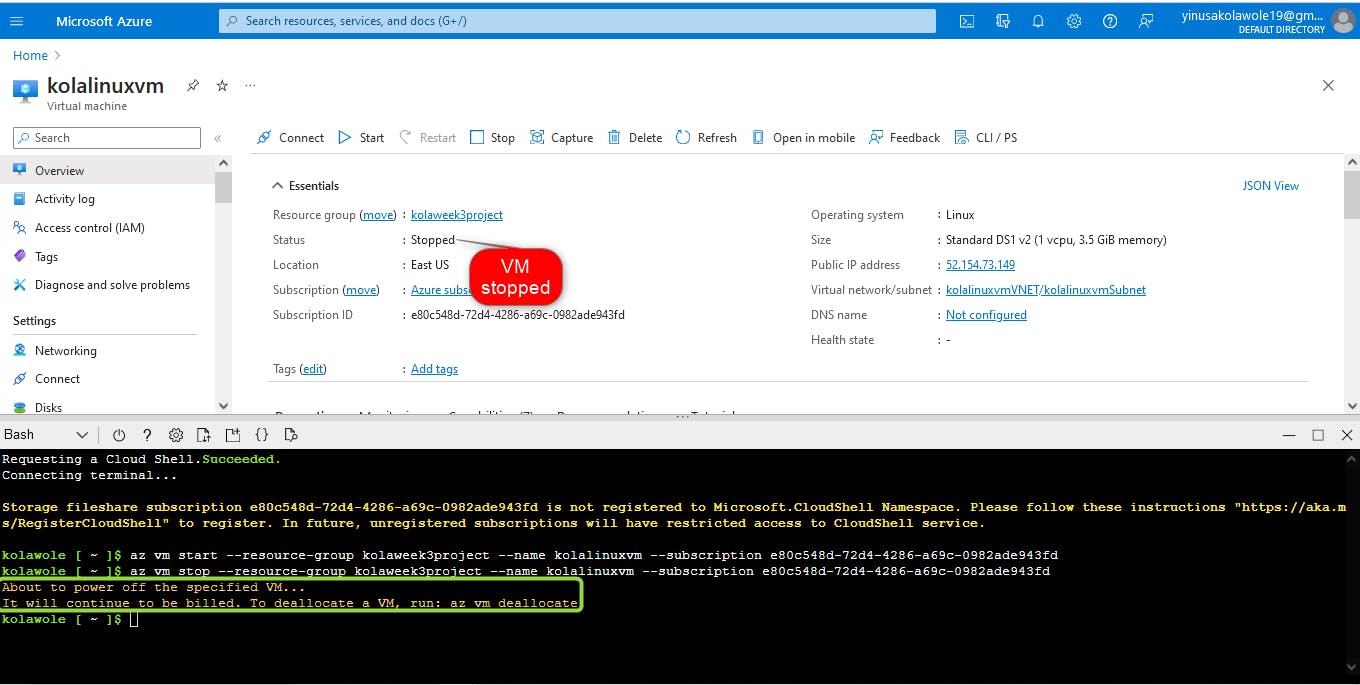
using the CLI page to stop the VM, kindly run on the CLI page via the Azure portal or run "az vm stop" on the CLI page via Bash as seen below
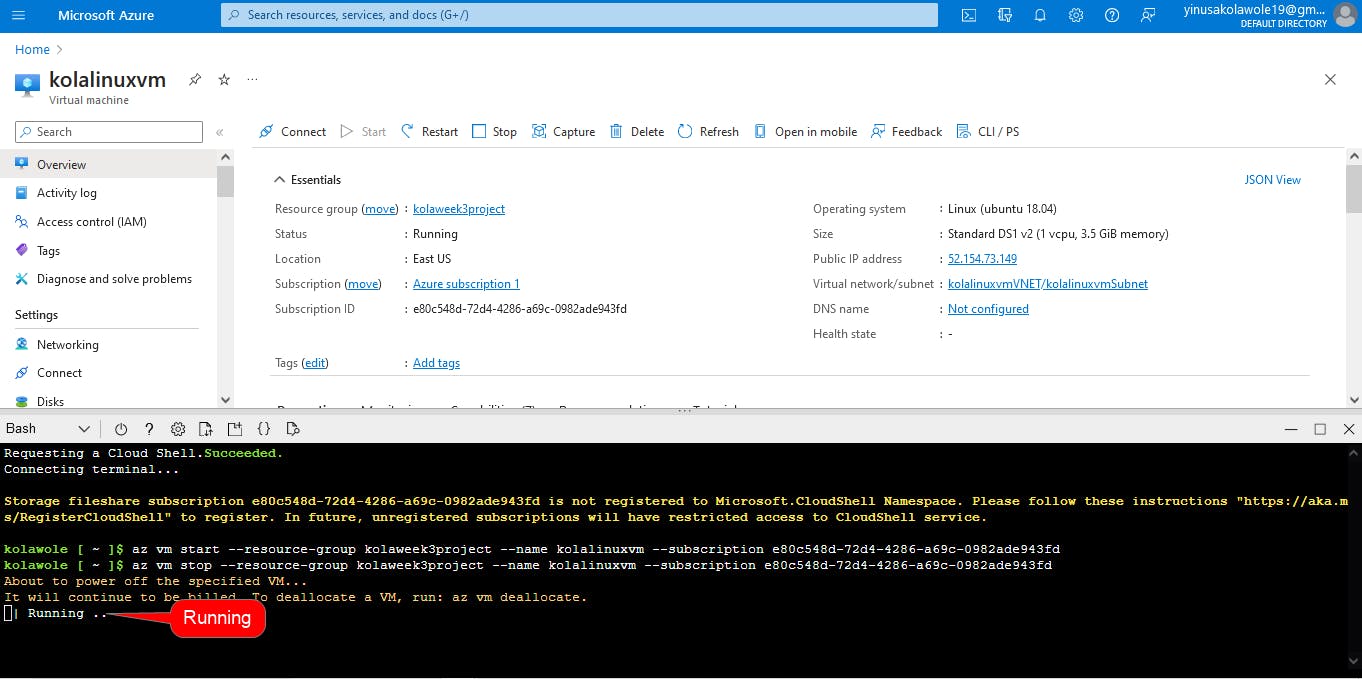
Powering off the VM

Confirming the stopped VM via the Azure Portal as seen below
Deallocating the VM IP-address via the CLI/PS page via the Azure Portal.
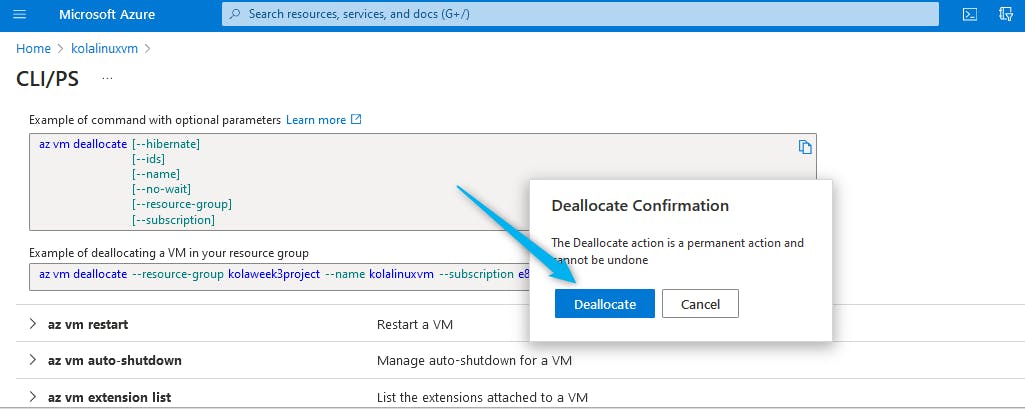
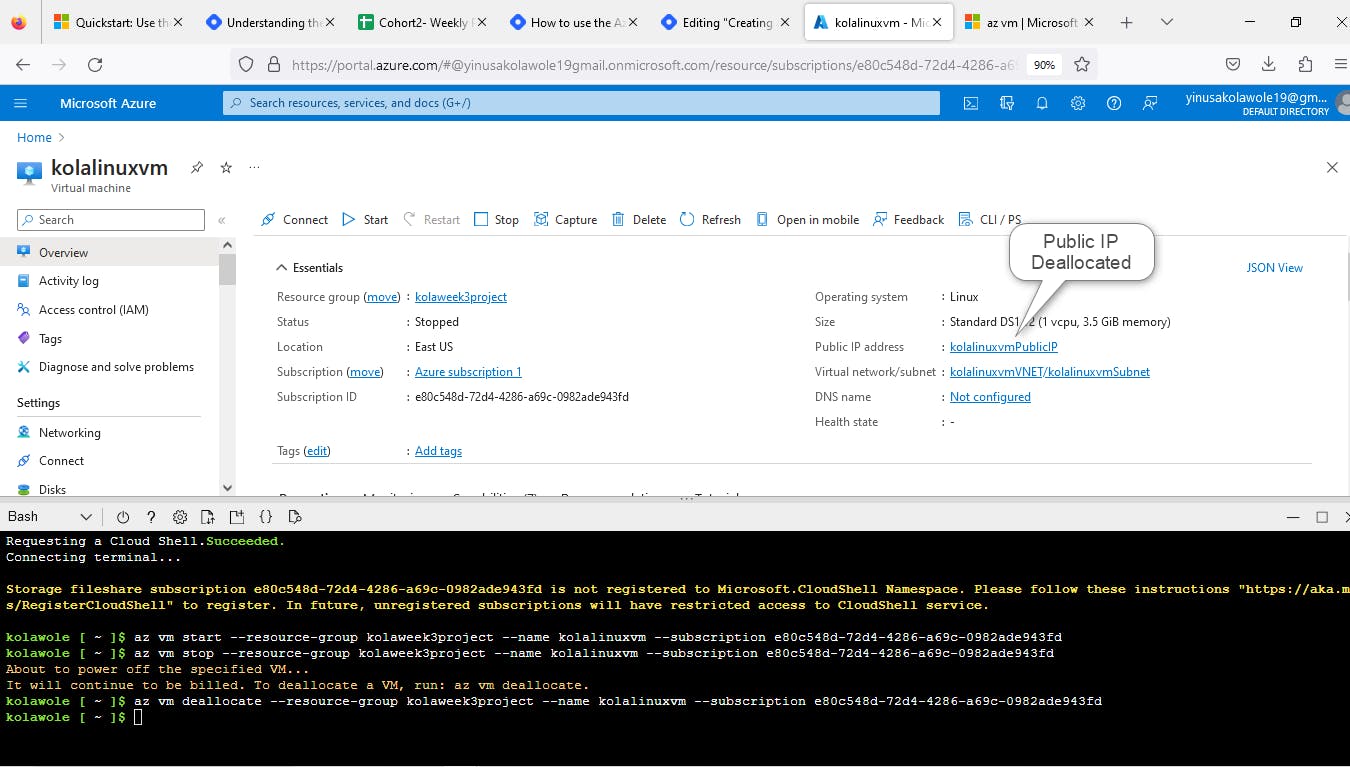
Confirmation of the "Running Deallocation". on the CLI Page via Bash interface

Confirmation of the Public IP deallocated as seen below
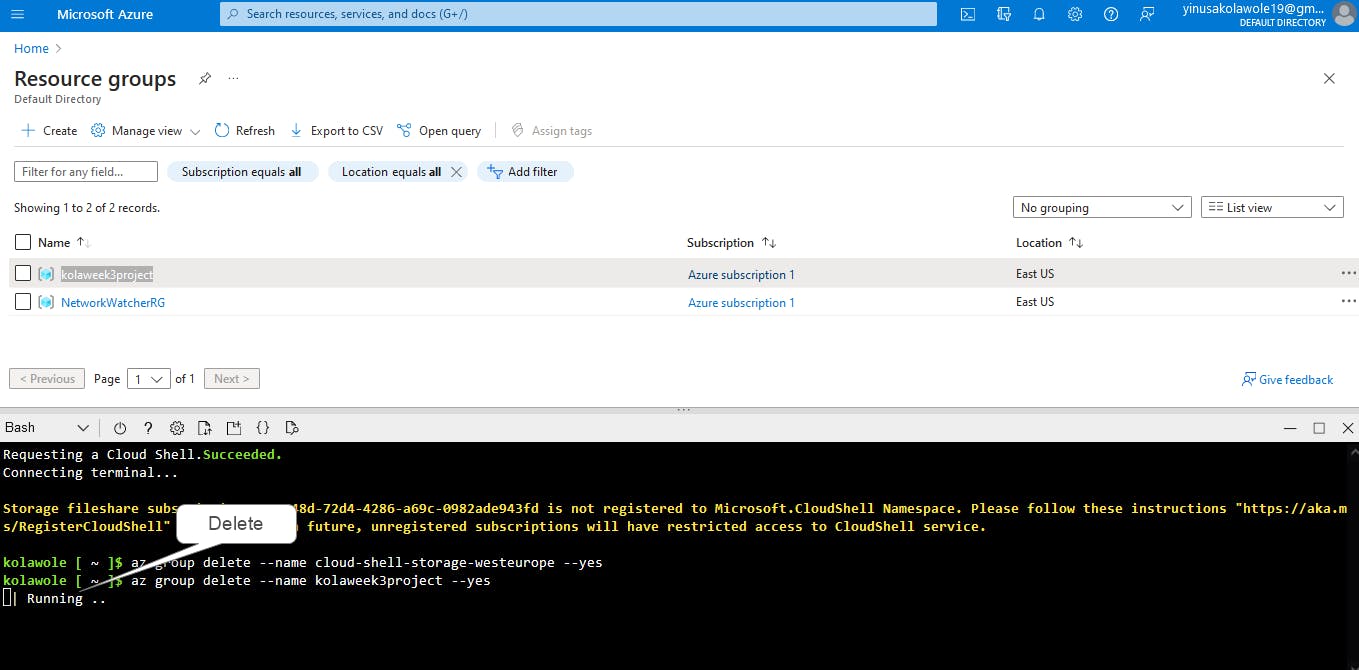
Deleting the resources group.
We have come to the end of this article on Creating a resource group and a VM with Azure CLI
If you find this article useful pls like, share, and follow me.